
Planning to photograph the blood moon eclipse on September 28th 2015
21/09/15 15:48 Filed in: Planning
During the night of september 27-28 2015 the moon will be at its perigee which will result in the largest super moon of 2015. Because the moon will be at its closest point to the earth she will shine at her brightest. Shortly thereafter, she will begin to disappear up to a total eclipse, when the earth will be in between the sun and the moon. During this eclipse and as a consequence of the bending of the solar rays around the earth, the moon will increasingly turn red. This phenomenon is called “blood moon”. Hence, if weather permits, during the night of september 27-28 we will have the opportunity to see a “super blood moon”.
How can we prepare to photograph this phenomenon ?
There are a number of elements to be taken into account in order to plan for the photoshoot. These are:
A few websites and tools can help us to plan for the best possible photo shoot of this brief and rare “super blood moon” phenomenon. Hereafter some of my ideas:
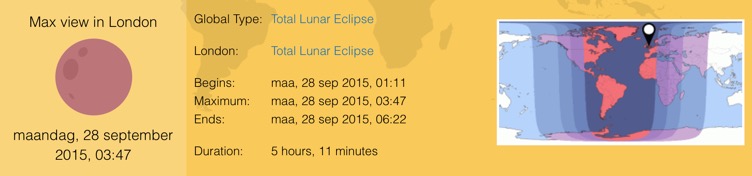
On this webpage you can find the time of the lunar eclipse for a number of cities around the world where it will be visible. As an example, here after the time for the lunar eclipse in London. The eclipse will be visible in London from 01:11 till 6:22 and will reach its maximum (total eclipse) at 03:47. It will be a short night sleep …
On the website mentioned above and once you’ve selected a location, you can find an animation of the lunar eclipse with the altitude and the direction of the moon. “The Photographer’s Ephemeris” is a web application offering a more interactive way to obtain the altitude and direction of the moon for any location on the globe. This application is also available for smartphone and tablet (see this page).
Obviously, to take photographs of the lunar eclipse we need a clear sky with no or limited cloud coverage. Therefore consulting the weather forecast for the location of the photo shoot is an important step in the planning. The Accuweather website gives besides the weather also a forecast of the cloud coverage at night for the chosen location.
Once you’ve identified an interesting photo location with limited light pollution the application on iPhone “PhotoPills” with the function AR (Augmented Reality) will enable to simulate the circumstances of the shoot. This simulation will help in identifying the desired point of view a few days in advance.
For making photographs of the super moon we advise the following besides your basic photo equipment:
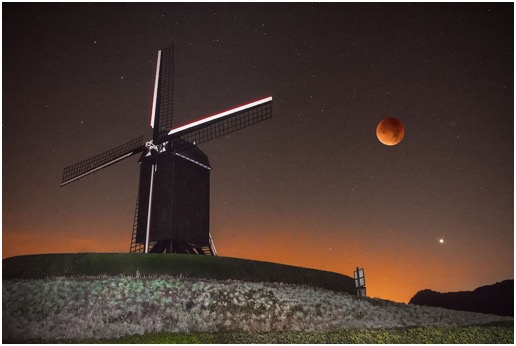
Hereafter a picture taken on september 28th of the super bloodmoon in Wannegem-Lede (Kruishoutem).
How can we prepare to photograph this phenomenon ?
There are a number of elements to be taken into account in order to plan for the photoshoot. These are:
- The moment of the eclipse
- The position of the moon versus the horizon
- The weather conditions
- The shooting location
- The photo equipment
A few websites and tools can help us to plan for the best possible photo shoot of this brief and rare “super blood moon” phenomenon. Hereafter some of my ideas:
The moment of the eclipse
The moment of the eclipse
On this webpage you can find the time of the lunar eclipse for a number of cities around the world where it will be visible. As an example, here after the time for the lunar eclipse in London. The eclipse will be visible in London from 01:11 till 6:22 and will reach its maximum (total eclipse) at 03:47. It will be a short night sleep …
The position of the moon versus the horizon
The position of the moon versus the horizon
On the website mentioned above and once you’ve selected a location, you can find an animation of the lunar eclipse with the altitude and the direction of the moon. “The Photographer’s Ephemeris” is a web application offering a more interactive way to obtain the altitude and direction of the moon for any location on the globe. This application is also available for smartphone and tablet (see this page).
The weather conditions
The weather conditions
Obviously, to take photographs of the lunar eclipse we need a clear sky with no or limited cloud coverage. Therefore consulting the weather forecast for the location of the photo shoot is an important step in the planning. The Accuweather website gives besides the weather also a forecast of the cloud coverage at night for the chosen location.
The shooting location
The shooting location
Once you’ve identified an interesting photo location with limited light pollution the application on iPhone “PhotoPills” with the function AR (Augmented Reality) will enable to simulate the circumstances of the shoot. This simulation will help in identifying the desired point of view a few days in advance.
The photo equipment
The photo equipment
For making photographs of the super moon we advise the following besides your basic photo equipment:
- Tripod
- Remote control
- Telephoto lens
The result
Hereafter a picture taken on september 28th of the super bloodmoon in Wannegem-Lede (Kruishoutem).
My workflow for using 6 or 10 stop ND filters
02/09/15 17:28 Filed in: Technique
My workflow for using 6 and 10 stop ND filters from Haida.
Camera settings:
- Format RAW (more dynamic range and flexibility)
- Focussing mode: Manual
- Exposure mode: Manual
- White balance: Sunny
- Shutter release: Mirror-up
- VR off
Workflow:
- Determine the best camera position and lens for the scene while hand holding the camera.
- Mount camera on your tripod and position as determined above.
- Frame the picture through the viewfinder or on the LCD screen (Liveview)
- Connect the remote control
- Set ISO sensitivity to the lowest setting i.e. 100 ASA (not on automatic !)
- Mount Haida filter holder on lens
- Determine and set the desired aperture (depending on desired depth of field)
- Focus the camera (on hyperfocal distance if needed)
- Mount Pola filter and adjust (if required by the picture scene)
- Measure required exposure (incl polafilter)
- If the contrast of the scene requires the use of an ND grad filter, mount it in the second slot of the holder (furthest from lens)
- Rotate and/or slide the ND Grad filter to cover overexposed part of the picture (most of the time the sky)
- Mount ND filter in the first slot (beween polafilter and ND Grad filter)
- Calculate the corrected exposure time. This can be done using a simple table or an App on a smartphone. Corrected exposure times for using ND filters
- Set exposure time on camera or remote control.
- Recheck all settings (focusing distance, aperture, exposure time)
- Cover the viewfinder (very important) !
- Make the exposure in two steps: the first to move the mirror up and the second to open the shutter)
After the exposure
- Use the function “highlights” in the camera to check the overexposed parts in the picture (most of the time only light sources or reflections may be overexposed)
- Check the histogram for sufficient shadowdetail
- Check the picture for desired sharpness (from front to back), technical imperfections, disturbing elements in the composition, etc…
My tips for using a tripod
13/06/15 15:59 Filed in: Technique
As a landscape photographer we sometimes have to work in difficult weather conditions. The list hereafter with hints and tips has been compiled through learning the hard way of the do's and don'ts.
- Use the sturdiest tripod you are willing to carry with you on your excursion. As a minimum your tripod and tripod head needs to be able to support weight of your camera and your longest telelens.
- The tripod head needs to have all adjustments (and preferably including fine adjustment capabilities) and a balanced weight distribution.
- Suspend a weight from the center column to make the tripod more stable (for example your backpack).
- Avoid extending the center column
- When using shutter speeds less than 1", use a remote control. For shutter speeds longer than 1" this is less critical.
- When using long lenses, choose to attach the lens to the tripod instead of the camera. This gives a better weight distribution.
- An L-bracket on your camera gives you the possibility to take horizontal as well as vertical pictures with a good balance of the camera.
- Before setting up your tripod, find the right point of view with your camera handheld.
- Use a quck release for attaching your camera and/or lens on your tripod.
- The "Vibration Reduction" technology enables us to make hand held shots at longer shutter speeds. Some camera/lenses are even capable to produce good sharpness at speeds upto 5 stops less. This gives us the ability to make more handheld shots making the use of a tripod not needed for these circumstances. The main advantage of this is the freedom of movement you get with this. The VR function though needs to be switched off when used on a tripod.
- Use a camera strap which can be detached when your camera is on a tripod. This will avoid the strap to flutter in the wind resulting unsharpness due to movement.
- I usually use "Live View" when my camera is on a tripod. This enables me to check if the camera is level, to zoom in to verify focus, no microvibrations due to the movement of the mirror, etc…
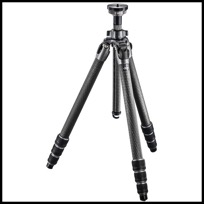
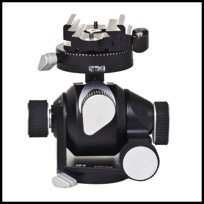
- Personally I use the following equipment: Gitzo Mountaineer GT3542L, Arca-Swiss D4 tripod head with flip-lock, RRS L-Bracket, and Op/Tech Utility Strap Sling.
My Blog
13/06/15 15:14